REWIRE SUPPORT
Using FL Studio ReWire with Sonar 
NOTE: ReWire was discontinued by Propellerheads / Reason Studios in 2020. Consequently, FL Studio as a ReWire device is also now deprecated in FL Studio. Official support ended with FL Studio 20.7. Please use FL Studio as a VST/AU to use it in other DAWs.
The following guide covers the steps required to use the FL Studio ReWire device with Sonar.
The guide assumes you have read and understood the general information and guidelines about using FL Studio as a ReWire client (see Client Mode).
1. Make sure the FL Studio ReWire device is registered
Registering ensures Sonar will detect the device at startup and launch FL Studio as a ReWire client. If you have disabled the device earlier or you are not sure if it is registered, repeat the FL Studio ReWire device registration procedure.
2. Launch Sonar
Launch Sonar and start a new project (or open an existing one).
3. Activate the FL Studio ReWire device
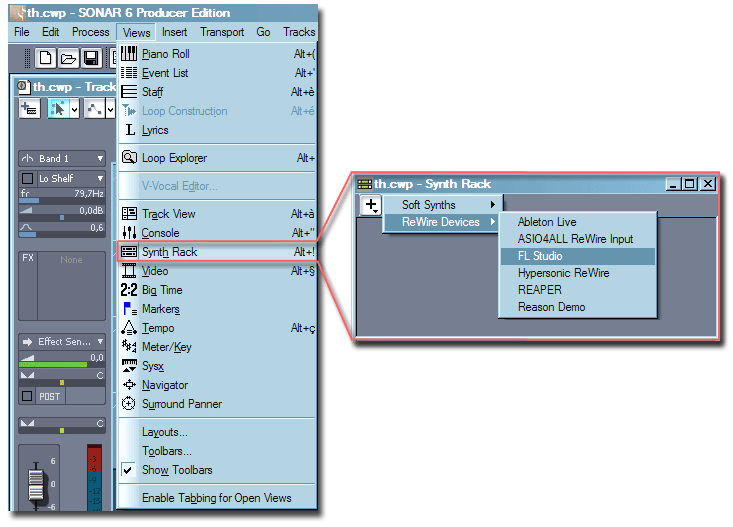
In the Sonar window, open the Views menu and select Synth Rack from the popup window and activate the FL Studio ReWire panel.

4. Show the FL Studio interface.

Sonar's Synth Rack contains the Properties button which lets you show the FL Studio interface. Click the button once to display the interface.
Alternatively, launch FL Studio from the shortcut on your Desktop or the one in your Start Menu.
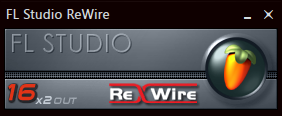
Since you have started a ReWire host prior to Sonar, you will see the FL Studio ReWire device panel.
The panel automatically displays the FL Studio window in the host. Clicking the FL Studio icon toggles the visibility of the FL Studio window similar to the Properties button in the Synth Rack.
6. End
FL Studio is now set up to function correctly as a ReWire device inside Sonar.
To test the setup, load an existing project in FL Studio or activate several steps in an existing channel and hit the play button in Sonar. You will hear FL Studio playing synchronized with Sonar.