PROJECT SETTINGS
Project General Settings


The Project General Settings page contains general options for each project, stored locally in each file.

NOTE: If the project settings icons are not visible in the side bar on left of the screen, click the Project button to expand the section.
Options
Project Data Folder
A custom save location for the current project can be set here. It is useful to keep all the data created with the project in one location. The data types saved include the project file (.flp/.zip), audio to disk recordings and dragged sample data (drag and drop edits from Edison, Slicex & Channel samplers). Any samples you add to the project from the Browser or other locations will remain where they are, use the .zip format project save to include them in this folder.
- Data folder location (Menu) - Choose where files used or created in the project are stored:
- Don't use a data folder - The default FL Studio 'User data folder' is used to save the project and common data-folders are used.
- Store relative to the project file - A folder with the same name as the FL Studio .flp project will be created to save the project. Additional sub-folders in that location will be created to save the project data. NOTE: This is the cleanest solution for project management in the long-term.
- Store in the specified folder - Choose an explicit location to save the project and its data sub-folders.
- Rename - Rename the project folder. NOTE: This is only possible when 'Store in the specified folder' is selected as the Data folder location.
- Folder (Icon) - Opens a Browser window to allow a custom project save location to be set.
- Ask for data folder - The Project folder collects all the project related data files. When used the Project folder dialog will open. The project folder will contain the project (.flp) and three sub-folders: Audio, Renders & Backups, containing all the relevant project data:
- On startup, when starting a new project and when saving - Basically all the time. Because you are the indecisive type.
- When starting a new project and when saving - Choose a save location when you start new projects and when you save. Because you may want to change your mind.
- When starting a new project only - Choose a save location when you start new projects. All subsequent saves will be to the selected folder.
- When saving only - Only ask when you save a project. You don't want to be bothered at the start, because you rarely make anything worth saving.
- Don't ask - Because sometimes its the polite thing to do.
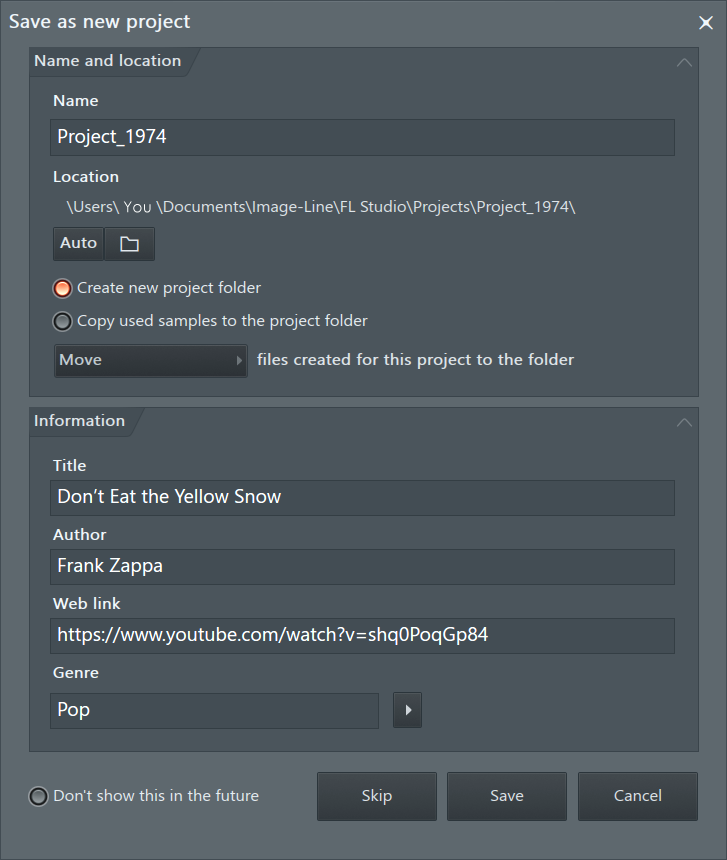
- Create new project folder - Creates a new project folder for the project.
- Copy used samples to the project folder - Copy factory and other samples used in the project to the Project Folder. This is similar to a .zip (Zipped loop package) save, where all samples in the project are archived. However in this case, to the project folder.
- File management (menu) - Additionally choose what do with any files you created in the project. For example, recordings, renders, sliced audio etc. Choose Move, Copy or Don't move or copy.
Note: The default save locations for various data-types are discussed here.
Time Settings
Use these controls to adjust the project Time Signature and event resolution (PPQ).
- Set as time division - This is the grid system used prior to the introduction of Time Signatures (see below). NOTE: If a Time Signature is used in the project, this option will not be available (grayed out). If you want to go from Time Signatures back to Time Divisions, you will need to remove all Time Signature markers in the project (Playlist and Patterns).
- Bar - The number of beats per bar. NOTE: Although this is a global project setting you can change the Pattern Length on the Channel Rack to set a custom number of beats per bar for each pattern. Just drag the Channel Rack to the right where indicated.
- Beat - The number of steps per beat.
- Set as time signature - Use this mode to set traditional Time Signatures. For more information on working with Time Signatures see the relevant sections in the Playlist & Piano roll. NOTE: You can set multiple Time Signatures in a Project using Piano roll and Playlist Time Markers (Shift+Alt/cmd+T).
- Numerator - Beats per bar (measure).
- Denominator - Beat length.
- Timebase (PPQ) - Sets the event resolution for the current project in Pulses Per Quarter-note (PPQ). In other words, how finely the time-line of the project is represented and so notes/clips/events placed on that time-line. The default setting is 96 with higher PPQ allowing finer control but it also uses more CPU. The Playlist maximum zoom is limited by the PPQ settings, if you need to zoom Audio Clips to a higher level, increase the PPQ setting. The Playlist and Clip placement only zooms to the maximum level supported by the underlying PPQ. NOTE: Adjusting PPQ to a lower level mid-project, will alter the placement of notes and clips if these events fall between the new PPQ grid. Increasing PPQ mid-project won't affect event placement.
PPQ affects the resolution of the following:
- Internal controllers.
- Automation Clip node placement.
- Edit Events.
- Piano roll note placement.
- Pattern Clip Playlist placement.
NOTE: The number of Beats per Bar define the overall pulse or natural rhythm of music. For example 'waltz' music is generally 3 beats per bar (1,2,3,1,2,3...) with a rhythmic emphasis on the 1 beat. Most 'pop' music is 4 beats per bar (1,2,3,4,1,2,3,4...) with an emphasis on the 1 also. However due to the different number of beats in each bar there is a distinctly different rhythmic pulse to each meter (3/4 or 5/8). More on time signatures and musical theory, of which you have been lured into a discussion of, here. There's also a discussion of the term 'beat' here to clarify confusion caused by its recent misuse on the interwebs.
Advanced
- Play truncated notes in clips - Restores notes that span a slice point in Pattern Clips. With this option off, the tail of the note is dropped from the second half of the sliced Clip. NOTE: This can cause projects to sound wrong when used on projects with this option off OR made prior to the introduction of the feature (FL Studio 10.5).
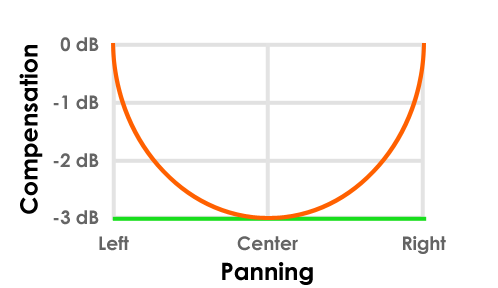
- Panning law - The purpose is to maintain a constant apparent volume as a sound is panned. For example, if a sound is panned hard left or right, only one speaker will be active. This will sound quieter than the center position where both speakers are active, unless steps are taken to counteract this effect. Circular panning maintains a constant apparent volume by progressively lowering the combined volume of the L+R channels by -3 dB as the pan passes dead center. Triangular panning does not apply this compensation, so the apparent loudness will increase as the sound passes the center position. There are a number of panning compensation methods used by various manufacturers, collectively they are referred to as Panning laws.
- Circular - Level compensation is applied when panning (orange). Level drops 3 dB at center pan.
- Triangular - No level compensation is used as a function of pan position (green). The overall level is 3 dB lower, across the pan range, compared to the extreme pan positions for circular mode.
NOTE: Don't fret over what panning law is or isn't used. When you mix a song, the relative pan positions and volumes are adjusted according to what you wanted to hear. In other words, you made the mix, you made it how you wanted it to sound (hopefully). So, a mix is a mix! Panning law is only a concern when sharing projects to make sure both installations are using the same settings. Changing the panning law after a project is mixed will change relative volumes and apparent stereo locations and so the mix (bad idea). If you are sharing track stems (audio from individual mixer tracks) then the panning law used by the project is 'rendered' into each stereo track, so is not a factor to worry about.
Also note that for audio clips, at default Channel Sampler settings the level readout will be identical to the recorded level, so when using Circular panning, a maximum of 3 dB can be added. It still works exactly the same way (extreme pan position and center have a 3 dB difference), but in this case volume is being added at extremes instead of subtracted at the center position.
- Fast declick for cut groups - When Sampler Channels are in a Cut Group, Declick mode is set to 'Fast' in order to 'Transient (no bleeding)'. This avoids clicks when one sample cuts another and it is stopped abruptly. This option is per-session. Once enabled, it will apply to all future projects.
Playlist
- Automatic crossfades - Overlapped Audio Clips will be audio-level crossfaded. To visualize crossfades select the Crossfade icon on the Audio Clip Focus tab.