FL Studio Mobile
Reverb 2
Reverb 2 simulates acoustic spaces. If you clap your hands in a bathroom or concert hall, the sound is quite different. This is due to the fact that in enclosed spaces reflections build up and overlap to create the reverberant sound. Reverb 2 parameters allow you to simulate different types of acoustic spaces. If you wish to give your acoustic and electronic instruments a realistic (live) feel, then use of reverb is critical.
To load presets tap the 'Default' (upper right) and choose from the Presets List.
Parameters
To set, tap the MAIN and TUNE tabs to access:
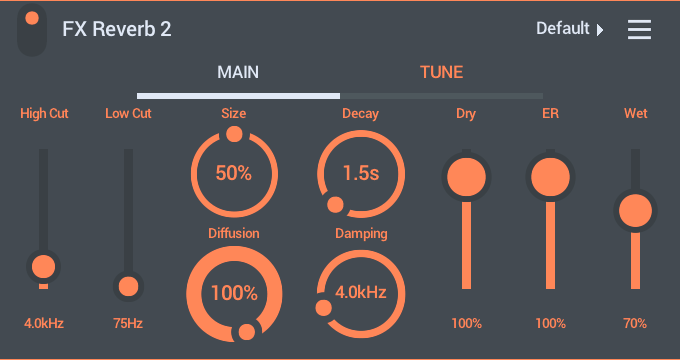
MAIN
- High Cut - Use this to remove high frequencies from the reverb, or to make the room sound duller.
- Low Cut - Use this to remove low frequencies from the reverberations. For example, if you are adding reverb to a drum track, using the Lo-Cut parameter will reduce the 'rumble' and muddiness from the bass drum by attenuating the bass frequencies before being passed to the reverb engine.
- Size - Set the size of the virtual room. For realistic effects, the Room Size should be adjusted according to the decay time. Small rooms sound better with a short decay time, large rooms sound better with longer reverb times.
- Diffusion - Controls the density of the reflections bouncing off the walls of the virtual room. A low diffusion setting makes the reflections sound more distinct and sparse, like closely spaced echoes. A high diffusion setting creates a dense series of reflections, so close they sound more like a constant decaying noise.
- Decay - This is the time it takes for the reverb signal to fade. Use low decay times for small rooms (good for fattening drum sounds), and long decay times for large rooms (halls or church-effects).
- Damping - The rate at which the high frequencies decay. This effect causes the sound to become gradually muffled and warmer.
- Dry - Level of the dry input signal mixed back into the output.
- ER (Early Reflection) - Sets the relative level of the first reflections in the reverb. These give you a sense of the size of the room.
- Wet - The amount of reverberant sound mixed in with the dry input. Values - 0 is 100% dry. 50 is a 50% mix of dry + reverb and 100 is 100% reverb with no dry signal.
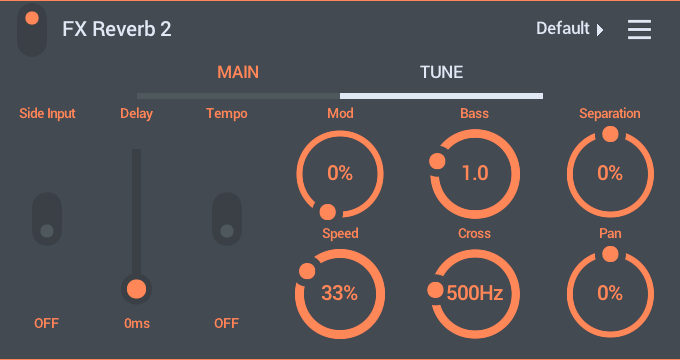
TUNE
- Side Input - Process the Mid (center) or Side (stereo) components of the input signal. OFF: MID processing, summed mono (Left+Right). This is the default mode. ON: Process the Side signal. The input must have stereo information before this mode will have any effect. Processing in SIDE mode can be useful when you are processing a complete mix, giving a sense of space and reverberation without washing out the center-pan details. Side reverberation processing affects the sound in the L/R stereo field while instruments panned close to center will remain unaffected.
- Delay (Pre delay) - Controls the delay time between the direct input signal and the first reverb reflection. Predelay should be set to modest values for small rooms, and can be increased to suit room size. Predelay creates a slap-back echo effect that can add atmosphere and muffle the signal, so use it wisely.
- Tempo - Selects a 'tempo based' predelay so the initial sound will be in time with the beat.
- Mod - Modulates the reverb time, to break up 'metallic' ringing sounds associated with artificial reverb. Small values make the reverb sound smoother and more natural. Extreme modulation values can add a detuned sound to the reverb.
- Speed - Speed of the sine-wave modulation of the reverb-time.
- Bass - Adjusts the decay time of the bass frequencies in the reverberations. The bass level has affects the overall 'mood' or sound of the virtual room. A bright room has less bass response, while warm rooms have a more bass.
- Cross - Determines which bass frequencies will be boosted by the Bass knob.
- Separation - Adjusts the stereo separation of the wet reverb signal. Any dry signal bypassing the reverb is left unaltered.
- Pan - Panning for the wet (reverb) part of the signal.