INSTRUMENTS / GENERATORS
Drumaxx - Percussion Modeling Instrument 
The Drumaxx percussion modeling instrument gives you total control over 16 physically modeled drums that can be routed to independent outputs for external effects processing. Great,
but why should you care when the internet is awash with drum samples? In two words, expressive control.
![]() See the Drumaxx video tutorial series here.
See the Drumaxx video tutorial series here.
Drumaxx is not based on samples or even commonly used 'synthesis' techniques, where oscillators are mixed and the result is always 'electronic'. Drumaxx uses modeling algorithms to create bass drums, hi-hats, snares, realistic and electronic sounds too. But what about the traditional 'Achilles' heel' of synthesis, cymbals? Drumaxx creates cymbals and metallic 'ethnic' percussion sounds too.
At the core of Drumaxx is a model where the vibrating membrane is represented as a mesh of interconnected points. Each point is given physical properties including mass, inertia, stiffness, damping, and all that good physics stuff. For the musician, this means Drumaxx gives you control over multiple parameters such as material, thickness, tension and shape. More importantly, the parameters can be modulated in real-time as a function of velocity or external controls. The drum body is also under user control too, including body size and shape. All this gives you multi-dimensional performance options, a Matrix of variables providing nearly infinite possibilities.
An alternative to Drumaxx is Drumpad (free) that allows you to load a single Drumaxx Drum Pad into any number of individual Channels and use the
FL Studio Stepsequencer or Piano roll to control them.

Visit the Drumaxx & Drumpad Image-Line forum for more patches and programming tips.
Overview
As shown above, selecting the Drum Pad will open the Modeling controls to match the Drum Pad. Click on the image above or the link below to jump to the help for that section.
- Main Controls
- Drum Pad Controls
- Modeling Controls
- Velocity Modulation
- Performance Sequencer
- Effects
- Multiple outputs
 Drumaxx video tutorial series here
- Drumaxx & Drumpad Image-Line forum
Main Controls

- Logo - Click on the Drumaxx logo to see version and registration information.
- Preset selector - The left/right arrows step through the presets in the bank. Click on the middle name field to open the preset browser and downloader for online content.
- Save/Load - Save/Load the complete set of 16 Drum Pads, including associated sequences. Kits are saved as .dmkit files. To Save/Load an individual Drum Pad use the Pad Name button (Load/Save).
- Options - Options include...
- Load/Save Drum Kit - Save/Load the complete set of 16 Drum Pads, including associated sequences. Kits are saved as .dmkit files. To Save/Load an individual Drum Pad use the Pad Name button (Load/Save).
- Copy/Paste Bar - Copy/Paste the currently selected sequencer Bar for the selected Drum Pad.
- Copy/Paste Track - Copy/Paste all 4 sequencer bars in the 'track' for the selected Drum Pad.
- Copy/Paste Pattern - Copy/Paste all sequencer data in the selected pattern (16 patterns are possible).
- Import Pattern - Loads sequencer patterns according to the Pad Trigger key numbers rather than selected Drum Pad numbers (as the 'Load' option does). For example, if a kick sequence was saved from Drum Pad 1 and Drum Pad 1 was originally mapped to C3, the sequence will load into the Drum Pad mapped to C3 in the current Drum Kit. If there is no Drum Pad set to C3 then the pattern won't be loaded. NOTE: This feature only works with Patterns saved from Drumaxx version 1.1 or higher.
- Save/Load Pattern - Save/Load all sequencer data in the pattern.
- Reset Pattern - Reset all sequencer data in the selected pattern.
- Master volume - Controls the volume of the Master output.
Drum Pad Controls
From left to right, top to bottom the controls for each of the 16 Drum Pads are:
- Volume - Pad volume level.
- Name button - Save, Load, Copy, Paste, Cut, Link & Route a Drum Pad.
- Up / Down arrows - The arrows leading the Drumpad name can be used to scroll through preset sounds. First click the name and load a Drumpad preset, once a directory has been selected the arrows will step through presets in the selected directory.
- Rename - Click to rename the Drum Pad. NOTE: Pad names will show in the Piano roll for the FL Studio version.
- Load/Save individual Pads - Click the name menu and save the Pad with a new name. This is also a great way to create custom drum-kits, loading and saving individual Pads.
- Copy/Paste - Select the source Drum Pad, select Copy, select the destination Drum Pad and select Paste. Easier, use the COPY/PASTE panel and click on the source Drum Pad, select the Copy button (double rectangle), click the destination Drum Pad and click the Paste button (arrow into rectangle).
- Learn - MIDI learn. Select the 'Learn' option and play the the key/pad on the controller you want to link to the Pad. The menu will close and the Pad name show 'Waiting for input' between selecting 'Learn' and playing the controller.
- Cut Group - Select a Cut Group for the Pad. Drum Pads in the same Cut Group will cut each other's sound. The most recent Pad in the Group will cut previously triggered Pads. Useful for transitions between open and closed Hi-hats for example.
- Set Pad Mixer track offset - Selecting an offset will route the Drum Pad to the indicated Mixer track. See: Multiple outputs. NOTE: The maximum number of outputs for the VST version is 11 (Master plus 10) and 99 for the FL Studio version (Master plus 98).
- Pad Trigger key - Click to select the MIDI trigger note for the Pad.
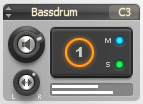
- Pad - Left-click to play the Drum Pad and select its Modeling controls. The selected Pad's number will be lit. Right-click to select the Pad's modeling controls without playing the Pad. Vertical play position on the Drum Pad is linked to velocity. NOTE: Velocity must be linked to 'Mallet amplitude' or other targets for the vertical play position to change the Pad's sound.
- M - Mute the Drum Pad.
- S - Solo the Drum Pad.
- Panning - Left/right stereo panning.
Modeling Controls
The Drum Pad controls change to reflect the selected Drum Pad as shown in the screenshot above. Click on the Drum Pad to be edited.

Mallet
Modeling Controls for the mallet (stick) used to hit the drum.
- Amplitude - Striking force.
- Decay - Decay time for the strike. Simulate quick, sharp hits or slower, deep hits.
- Noise Level - Noise to simulate brushes and softer mallets. As the noise level is increased the fundamental (lower) frequencies are reduced. To compensate you can increase the amplitude.
- Noise Phase - To be used in conjunction with Noise Retriggering. The Phase will influence the tonal character of the mallet.
- Retrig - Noise retriggering. When selected the tonal character of the noise remains constant (the same each time as the noise is 'retriggered'). When deselected the noise will continue to randomize so that each hit will have a slightly different character.
Membrane
The drum membrane (skin) has a significant impact on the tonal character of the final sound. There are 4 key parameters - Tension, Phase, Material and Shape. When the right balance between these four controls is achieved, the sound will be most natural. We recommend adjusting Tension and Phase first, so that the pitch is close to what you need. Then adjust Material and Shape to fine-tune the tonal qualities. If the balance is right, the Drum Pad will sound like a drum, and if not, the Drum Pad can sound 'blurry' and 'loose'.
- Decay - Decay time for the membrane response and reflections.
- Tension - Membrane tension (how tightly stretched the drum is).
- Material - This control moves the membrane material through a range of possible characteristics and types. Generally left are heavier slower materials and right are lighter more reflective materials. Set by ear.
- Cutoff - High frequency cutoff.
- Phase - Relates to the impact-point on the drum-head. Set by ear.
- Size - Drum-head size.
- Shape - The shape can be varied from square (left) to round (right). Most drum-heads are round, but experimentation is always rewarded!
Low Frequency Filtering
Low cut frequency filtering
- Freq - Low frequency cutoff.
- Res - Resonance or 'Q' adds a peak at the equalizer's cutoff frequency. Useful to simulate resonances in the drum head or body or accentuate the 'tone' or pitch of a drum.
Self Oscillating Filter (SOF)
The SOF is an 'allpass' filter with a narrow frequency-peak exhibiting high levels of self-oscillation. When the frequency-peak is swept quickly downwards, it is useful to make kicks and snares.
- Freq - Down-sweep starting frequency. The frequency will sweep down to ~20 Hz (fixed).
- Decay - Down-sweep time. Fast sweeps produce the most realistic 'kick' sounds.
- Level - SOF mix level. The SOF sweep is added before other filters in the modeling engine, immediately after the Membrane sound is generated.
Mid Frequency Filtering
Mid-range frequency filtering. The Mid frequencies also include EG controls (EG Freq & EG Level) that allow modulation of the associated parameters. EG modulations are particularly important for creating more realistic drum sounds.
- Freq - Initial filter cutoff frequency.
- EG Freq - Determines where (left = lower, right = higher) the frequency moves after the mallet hits.
- Level - Boost/Cut Mid frequencies.
- EG Level - Determines where (left = lower, right = higher) and how strongly the frequency moves after the mallet hits.
- Res - Resonance or 'Q' adds a peak at the equalizer's cutoff frequency.
- Decay - How quickly the Freq and Level are modulated.
- Retrig - Retriggering of the modulation envelope. Zero = no retriggering. Retriggering values (I to III) are necessary to make Claps for example.
NOTE: The Mid frequency Freq and Level controls are excellent modulation targets for velocity.
High Frequency Filtering
High frequency shelf filtering.
- Freq - High frequency cutoff.
- Level - High frequency level.
- Res - Resonance or 'Q' adds a peak at the equalizer's cutoff frequency.
Output
Main output controls.
- Hold - Overall sustain.
- Lo Fi - Bit reduction effect. Turn right for a low bit-rate crunch.
- Pitch - Drum tuning.
Velocity Modulation
Velocity can be assigned to 4 modulation targets per Drum Pad. If more control independent of velocity is needed, any of the modeling parameters can be linked to external modulation sources (a mod-wheel for example).
- Parameter - Select Modulation targets by clicking on the Parameter name field and selecting from the pop-up menu.
- Value - Modulates the target parameter value as a function of velocity and 'Value' setting. If the velocity = minimum, the target parameter remains at its original value. If velocity = maximum then the target parameter = Value setting. Intermediate values are the linear scaling between those two points.
NOTE: You can automate any of the modeling controls using standard automation & modulation techniques.
Performance Sequencer
The Sequencer is primarily for live use, so complex and perfectly 'in time' rhythms can be triggered from a single key. When a trigger note is held, the Pad's sequencer will play until a new pattern is triggered or the same pattern is retriggered. Drum Pads can be assigned up to 16 unique patterns, each with a unique trigger key. To create a pattern, click on the Step-Buttons to play in the bar and set their velocity sliders (to the left of each Drum Pad) where needed. NOTE: Velocity must be associated with the Drum Pad controls in the 'Velocity Modulation' matrix for these sliders to have any effect.

- Play/Pause - The sequencer tempo is linked to the host tempo and all patterns on all Drum Pads play.
- Pattern - Select the pattern number, 1 to 16, to play on the selected Drum Pad. To edit a pattern, select the pattern number and edit the Step Sequencer steps by selecting/deselecting them. The pattern changes are automatically saved for the edited pattern.
- Trigger key - Select a MIDI key to trigger the currently selected pattern. By assigning different MIDI keys to each of the 16 patterns (per Drum Pad) complex sequences can be accessed.
- Pattern length - Set the number of steps in each pattern. By default the Step Sequencer displays 16 steps. To activate a step Left-click an inactive step (LED off). To deactivate a step Left-click an active step (LED on). If your pattern is more than 16 steps use the Pattern Bar control to access more steps in banks of 16. Up to 64 steps can be accessed this way.
- Pattern Bar - Accesses each of the 64 possible steps in groups of 16 (bars 1 to 4).
- Swing - Alters the timing of notes to produce a 'lilting' or 'shuffle' rhythm. Swing holds the first note of the bar at the expense of the second note in the bar.
- Steps - Click on a step to activate or deactivate it. The Drum Pad displays a LED when selected.
- Velocity sliders - To the left of each step a small volume slider controls the velocity/volume for the step.
- Copy/Paste, Load/Save sequences and patterns - Use the Options menu.
- Import pattern - Loads sequencer patterns according to the Pad Trigger key numbers rather than selected Drum Pad numbers (as the 'Load' option does). For example, if a kick sequence was saved from Drum Pad 1 and Drum Pad 1 was originally mapped to C3, the sequence will load into the Drum Pad mapped to C3 in the current Drum Kit. If there is no Drum Pad set to C3 then the pattern won't be loaded. NOTE: This feature only works with Patterns saved from Drumaxx version 1.1 or higher.
Effects
Drumaxx incorporates an 8 band Equalizer and Limiter into the output of the plugin.

Equalizer
- Enable/Disable - Select the switch above the Equalizer label.
- EQ bands - Adjust the EQ bands from -100% (- 6 dB cut) to +100% (+ 6 dB boost).
Limiter
- Enable/Disable - Select the switch above the Limiter label.
- Gain - Limiter input level. Higher levels will cause more limiting. The Limiter threshold is set to 100% output level with an infinite compression-ratio.
- Release - Limiter release time. Longer release times will cause the decay (tail) of the drum to be more audible.
Multiple outputs
Each Drum Pad can be sent to separate Mixer track for external effects processing. In the FL Studio version, Drum Pads are sent to the Mixer track Drumaxx is loaded on plus an offset. The Mixer track offset can be changed using the Drum Pad name menu. For example, if Drumaxx is routed to Mixer track 2 and the Drum Pad has an offset of 6, the Drum Pad will be routed to Mixer track 8. NOTE: The maximum number of outputs for VST is 11 and FL Studio native version, 99.
- Enable independent Drum Pad output - Click on the Drum Pad name window (shown below left) and select an offset from the drop-down list. The number is an offset to the host Mixer track, listed as 'Master'.
- Change Drum Pad output channel - Click on the name menu on the Drum Pad and select a new Mixer track offset.

In the example left, the drop-down menus are shown for VST (Pad 2) and FL Studio native (Pad 4).
FL Studio native - Offsets can range from negative values to +98 (not shown). Negative numbers indicate Mixer tracks to the left of Drumaxx's routed Mixer track, positive to the right.
VST - 11 outputs (Master + 10) are available. The Mixer channels these route to will be determined by the plugin wrapper's settings (see your Host's manual).
NOTE: 'Master' in VST & FL versions refers to the Mixer track Drumaxx is routed to, not (necessarily) the host's 'Master' Mixer track.
Drumaxx Online
Hear demo tracks, check for updates or purchase Drumaxx online at www.image-line.com
Plugin Credits:
Drumaxx was created by Maxx Claster exclusively for -