MIXING & EFFECTS
Mixer menu
This section covers the Mixer menu commands. For reference, the Mixer diagram is at the bottom of this page.
Options
- Disk recording
- Render armed tracks to wave file(s) (Alt+R) - Renders all Mixer Tracks armed for recording to a wave file (see Disk Recording).
- Render selected tracks to wave file(s) (Shift+Alt+R) - Renders all selected Mixer Tracks to a wave file (see Disk Recording).
- Auto-unarm - Tracks armed for recording will be automatically unarmed when stop is pressed.
- Auto-create audio clips - FL Studio inserts Audio Clips in the Playlist after recording. NOTE: The first available Playlist track that can fit the recording will be used. If you want to ensure recorded Audio Clips are placed where you want them, Right-click a Playlist Track you want to use and select Track mode > Audio Track > (choose Mixer Insert).
- Latency compensation - This applies to external audio input latency caused by the ASIO Buffer length setting. FL Studio will remove time equal to the input latency from the start of recorded Audio Clips, so they correctly align with the Playlist. NOTES: Depending on your system and ASIO drivers, you may still need to change the Playback tracking source driver options. If these don't work you can manually set the Audio input delay compensation (C) from the Mixer track properties panel.
- 32-Bit float recording - If enabled, audio recording Tracks are saved as 32-Bit wave files, otherwise the standard 16-Bit format is used. '32-Bit floating point recording' is only necessary if your audio device is set to record at a bit-depth higher than 16-Bit (24-Bit for example). 32-Bit will preserve the full quality of all audio device quantization's above 16-Bit. NOTE: FL Studio receives audio from the audio device as a pre-digitized stream, the bit-depth set here has no effect on the recorded bit-depth (that is set in the audio device options). Saving a 16-Bit sample at 32-Bit will make the file significantly larger with no gain in quality.
- Auto-name playlist tracks - Automatically names tracks.
- Plugin delay compensation (PDC) - Compensates for plugin processing delays to bring Mixer Track audio back into sync (see the section on PDC).
- Reset manual latency on all tracks - Reset all manual latency values to zero.
- Automatic - Automatically applies PDC and updates the PDC settings when changes are detected. This is the default mode for new projects. If APDC fails you will need to manually adjust PDC delays on the offending Mixer Track/s. See manual PDC for details. NOTES: 1. PDC state is saved per-project. 2. There is a Wrapper > Settings > Latency option where you can set a manual latency offset for plugins that incorrectly report their latency. This is remembered per-plugin.
- Compensate automations - Ensures automation of FX parameters is aligned with the audio entering the Mixer track when Plugins are delayed. If you have older projects, made before FL Studio 20.7, it may be necessary to deselect this option in order for them to sound as expected. Any manual PDC tweaks you may have used will now be obsolete with this option selected.
- Link all parameters... - Opens a link-dialog that is designed to link automatable software parameters to 'tweaked' hardware controllers and then automatically move to the next
item in the 'parameter list' ready for the next link. There are options for skipping parameters or jumping to new locations in the list as described below:
- Basic operation - Select 'Link all parameters' from the menu, and move the first hardware controller to be linked (the link is made to the first item in the 'Current parameter' list), when you move the second hardware controller it will be auto-linked to the next parameter and so on, until the end of the parameter list is reached or the link-dialog is closed. You may choose to keep moving the same hardware controller (in this case all parameters will link to the same hardware knob) or move to a new hardware controller, where the new hardware controller will be linked.
- To skip a link - Left-click the Skip button at the bottom of the link-dialog (immediately left of the 'Accept' button).
- To jump directly to a parameter - use the Current parameter menu (top most in the link-dialog) and select the target parameter you are interested in. You can then continue auto-linking from that point in the list by moving hardware controllers as before OR jump to another parameter in the list using the 'Current parameter' menu as previously described.
- View
- Waveforms (Alt+W) - Replaces the Mixer peak meters with waveform views. Width now equals peak level.
- Names at top - Pins track names to the top of their window.
- Routing cables - Shows the routing cables when sends between tracks are made. Jiggly goodness!
- Compact plugin list - For the Extra wide view that shows plugins under the tracks, this option compacts the list to avoid empty slots.
- Track inspector on left side - Toggles the position of the FX slots, Track Properties and Track I/O to the Left (alternative) from the Right (default).
- Colorful mixer - Choose Off, Low, Medium or High color saturation. This relates to full-height Mixer Track coloring. When Off, only the top part of the track is colored.
- Alternative mixer highlighting - Enables squared bracket surrounding the first 'selected' Mixer track and changes the Mixer Insert headers to use contrasting text. For use with bright colors.
- Lines between tracks - A subtle dividing line is added between Mixer Tracks to aid visual separation.
- Always show external input levels - When monitoring is set to 'When armed' or 'Off' this option will allow the peak meters to continue to respond to external inputs. This can be a useful cue that audio is present on an external mic, before arming for recording.
- Detached - Detaches the Playlist from the FL Studio workspace, allowing it to be dragged to another monitor.
Mixer Track (applies to selected track)
- Rename, color & icon... (F2) - Set the selected Mixer Track name, color & icon - Use these to improve the visibility of important Mixer Tracks or to aid surround-mixing setups (a set of surround-mixing icons have been provided). Once the name dialog is open, press (F2) to randomly select colors. For a selection of tracks - The name/icon will only apply to unnamed tracks.
- Assign to new audio track(s) - Links the selected track/s to Playlist Tracks in Audio Track Mode. This facilitates Audio Recording and Audio Clip workflow.
- Unassign from audio track(s) - Disables Audio Track mode for the Linked Playlist Tracks. Audio Clips routed to the unassigned Mixer Track will remain routed.
- File - Open and save Mixer state files.
- Open mixer track state - Allows you to restore a previously saved Mixer Track state in the selected Mixer Track.
- Save mixer track state - Allows you to save the state of the selected Mixer Track, which includes the Track settings and plugin
filters. NOTE: Drag and drop this icon on another Mixer Track to instantly duplicate the selected track (FX chain) to another Mixer Track.
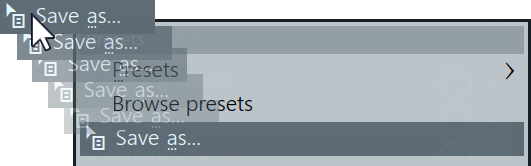
- Browse states - Opens the Mixer presets in the Browser menu.
- Open audio editor (Ctrl+E) - Opens Edison in the first available FX slot in the selected Mixer Track.
- Open audio logger (Ctrl+E) - Opens Edison in the first available FX slot in the selected Mixer Track. Edison will be set to 'audio logging' mode, that is, recording on FL Studio play and set to a 5 minute rolling audio-log.
- Reset selected track(s) to default - Deletes all FX and resets the track name and color to default. See also Reset mixer track routing.
Routing
Inter Mixer Track routing options:
- Channel routing:
- Route selected channels to this track (Ctrl+L) - All Channels selected in the Channel Rack will be linked to the currently selected Mixer Track.
- Route selected channels starting from this track (Shift+Ctrl+L) - All Channels selected in the Channel Rack will be linked to individual Mixer Tracks, starting from the current one. For example, if three Channels were selected and the current Mixer Track is 4, the Channels will be linked to Tracks 4, 5 and 6.
- Track routing:
Selected tracks to this track:
- Route selected to this track - Creates audio sends from the selected track/s to the current track. You can also route to a selection of tracks that will be linked in ascending order.
- Route selected to this track only - Creates audio sends from the selected track/s to the current track AND deselects their own Master sends.
- Sidechain selected to this track - Creates sidechain sends from the selected track/s to the current track.
- Sidechain selected to this track only - Creates sidechain sends from the selected track/s to the current track AND deselects their own Master sends.
This track to selected tracks:- Route this track to selected - Creates an audio send from the current track to the selected track/s.
- Route this track to selected only - Creates an audio send from the current track to the selected track/s AND deselects the current tracks Master send.
- Sidechain this track to selected - Creates sidechain from the current track to the selected track/s.
- Sidechain this track to selected only - Creates sidechain from the current track to the selected track/s AND deselects the current tracks Master send.
- Select Channels or Mixer tracks based on the following rules:
- Channels routed to this track (Alt+L).
- Tracks this one is routed to
- Tracks routed to this one (Ctrl+Alt+L).
- Group - Groups selected tracks and adds separators.
- Reset selected track(s) routing - Deletes all track routing and sets to default. See also Reset mixer tracks.
- Solo (S) - Solos the output from the selected Track.
- Alt Solo (Alt+S) - Solos the selected Track AND all other Mixer Tracks routed TO and FROM it.
Group
- Separator - Adds/removes a visual separator BEFORE the selected track. This is not a dock!
- Create group... - Groups the selected Mixer tracks with separators to the left and right (after you complete the group name and icon pop-up).
- Auto color group - Applies the selected tracks color to others in the same group.
Layout
- Dock to - The mixer has 3 docking panels, you can choose Left, Middle or Right. Click the dock splitters to open/close the Left and Right docks.
- Move left (Shift+Left Arrow) - Move the selected Mixer Track left.
- Move right (Shift+Right Arrow) - Move the selected Track right.
CPU
- Allow threaded processing - When OFF will override any individual Plugin Wrapper Plugin Menu 'Allow threaded processing' ON settings. NOTE: When ON this will not override Plugin Wrapper Plugin Menu 'Allow threaded processing' OFF settings or the Plugin Wrapper Processing Tab Option 'Allow threaded processing' OFF settings.
Mixer reference diagram

Full descriptions are available on the main Mixer page.
NOTE: Most controls are automatable (Right-Click and select 'Create automation clip').